| **Color Temperature** | **Light Source** |
| 1000-2000 K | Candlelight |
| 2500-3500 K | Tungsten Bulb (household variety) |
| 3000-4000 K | Sunrise/Sunset (clear sky) |
| 4000-5000 K | Fluorescent Lamps |
| 5000-5500 K | Electronic Flash |
| 5000-6500 K | Daylight with Clear Sky (sun overhead) |
| 6500-8000 K | Moderately Overcast Sky |
| 9000-10000 K | Shade or Heavily Overcast Sky |
This only works if you select an area you know to white. if the area you select is not white or neutral, Lightroom will compensate for the colours in the area giving unpredicted results.
### Tone The tone sliders are where we do most of the correction we would want to do to an image. We have control over **Exposure** for the overall brightness of our images, and **Contrast**, for contrast. A rule to follow is to edit first using **Shadows** and **Whites**, followed by **Highlights** and **Blacks**, before using **Exposure** and **Contrast**. These sliders are represented on the histogram and can be manipulated there too. 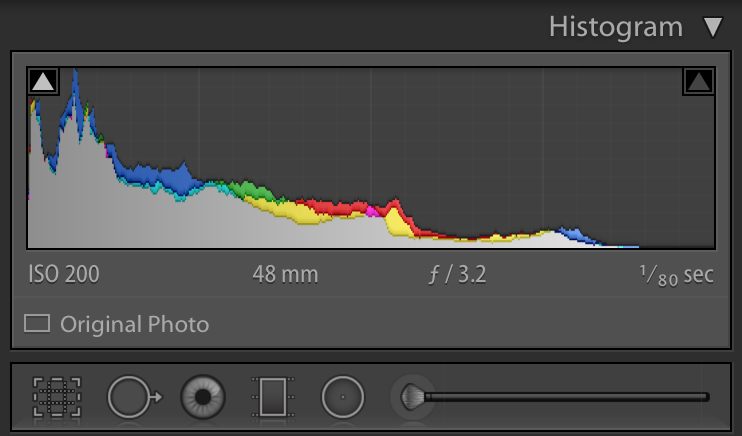 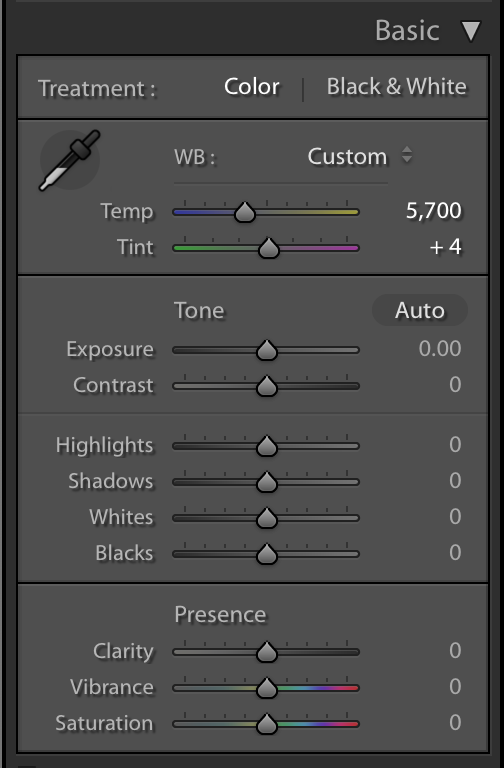 # Cropping Cropping an image can make a significant difference the quality of an image. adjusting the composition to make improve the way your subject is being present, or shifting from landscape to a portrait. Can transform a O.K. photo into something special. ### Aspect The crop tools will allow you crop and rotate you image to any shape or angle. You can select a common aspect ration from the **Aspect** drop down, or enter your ow custom one. The padlock icon will lock or unlock the image from conforming to the select aspect ratio. 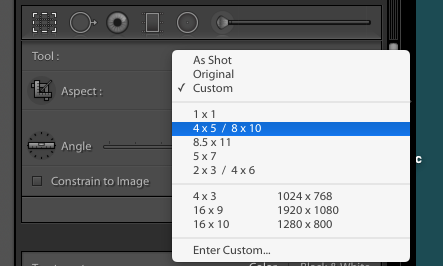 ### Angle Angle can be adjusted using the slider or by clicking and dragging slightly away from the edge of the cropping bounding box. When adjusting the angle a finer mesh grid will appear as an overlay making it easier line-up horizontal and vertical line. ### overlays The crop tool includes a few built-in overlays to aid composition. by default the you see a rule of thirds grid. Pressing '**O**' will cycle through **Diagonal**, **Triangle**, **Golden Ratio**, and **Golden Spiral**. Pressing '**Shift + O**' will rotate the overlay. # Presence ### Clarity Clarity help improve definition by boosting contrast in the in mid-tone and highlights. Often without blowing out the bright points. It also maintains detail in the shadows and blacks. ### Vibrance Vibrance boosts colours that are muted while leaving highly saturated colours alone. In a lot of images you'll notice cooler colours (Blues and Greens) becoming more saturated while warmer colours are affected less. ### Saturation Saturation applies to all colours equally. And will make the colours in you image pop.It's a good idea to try using **Vibrance** before **Saturation**.