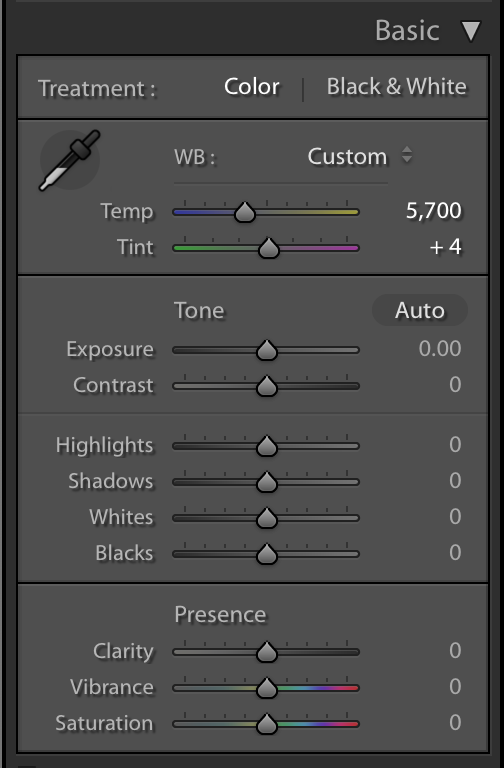
# Basic panel
The basic is where a lot of or initial editing will happen. Here we have control over White balance, Tone and Presence.
### White Balance
Shooting with your white balance set correctly give you a huge advantage when it come to editing your images, however it is worth remembering that what balance is applied to to your image in camera after it has bee captured. This means we retain the ability to adjust an images whit balance after it has be taken in Lightroom.
The purpose of adjusting the white balance of an image is to compensate for undesirable colour cast that can appear in an image due to the light source.
| **Color Temperature** | **Light Source** |
| 1000-2000 K | Candlelight |
| 2500-3500 K | Tungsten Bulb (household variety) |
| 3000-4000 K | Sunrise/Sunset (clear sky) |
| 4000-5000 K | Fluorescent Lamps |
| 5000-5500 K | Electronic Flash |
| 5000-6500 K | Daylight with Clear Sky (sun overhead) |
| 6500-8000 K | Moderately Overcast Sky |
| 9000-10000 K | Shade or Heavily Overcast Sky |
#### Temperature (Temp)
The table above include temperature ranges for some common sources of light.
Using the Temp slider we can warm or cool an image to make it appear more natural. Images shot outside in daylight can appear to have a blue cast and images shot inside using Tungsten Bulbs can appear very yellow.
#### Tint
The tint slider allows us to adjust for casts generated by some artificial light sources. Fluorescent bulbs can give a slight green cast. Moving the slider in a positive direction will compensate more for the green cast by increasing the the amount of magenta.
#### Eyedropper
The white balance section also includes an eyedropper. clicking the eyedropper will engage it. You can then click an area in you image you know should be white or neutral grey, and Lightroom will figure out the temperature and tint for you.
This only works if you select an area you know to white. if the area you select is not white or neutral, Lightroom will compensate for the colours in the area giving unpredicted results.
### Tone
The tone sliders are where we do most of the correction we would want to do to an image. We have control over **Exposure** for the overall brightness of our images, and **Contrast**, for contrast.
A rule to follow is to edit first using **Shadows** and **Whites**, followed by **Highlights** and **Blacks**, before using **Exposure** and **Contrast**.
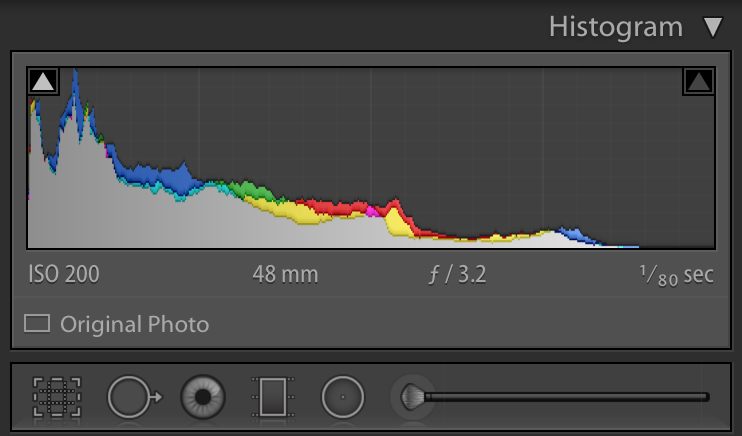
These sliders are represented on the histogram and can be manipulated there too.