Library View
A Lightroom catalog is made up of a folder or series of folders that have been imported, and a series of collections of selected images for the imported folders.
Navigation Panels
Folders
The folders panel located on the left will indicate the physical disk or drive the images are located and the folder name of each import. Depending on which options you selected during import your folders may represent dates, or another file structure.
Each folder may contain subfolders and will indicate the number of images present in the folder. If you manually add images to the the folders without importing them with Lightroom, they won't show up in till you perform a synchronisation by right clicking on a folder and selecting "Synchronize Folder…".
Catalog
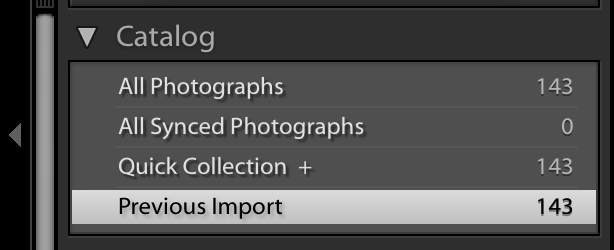
The catalog panel sits above the Folders panel and displays information about he number of images in the catalog.

You can select All Photographs, All synced Photographs Quick Collection +, or Previous Import to display the corresponding images.
Quick Collection is a way of quickly identify images you want to work with or add to a collection. Selecting an image in the image viewer and Pressing b on the keyboard will add the image to the the quick collection. Pressing b again will remove it.
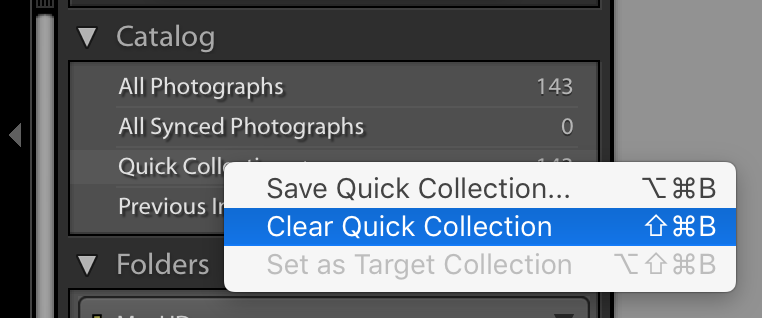
You can clear or save a quick collection by right clicking Quick Collection in the catalog panel.

Image Viewer
The image viewer is where we can see all the images from the selected folder/s or collection/s. We can use the the + and - keys to zoom in and out to display more images or see larger images.
Ratings and Labels
Rating images
Images can be assigned a rating from 1 (★) to 5 (★★★★★) stars. with and image selected pressing a number for 1–5 will assign a corresponding star rating. 0 will remove the rating.
Star ratings are a handy way grouping images based on quality. Assign higher ratings to images you like more and lower rating to images that are less valuable. We can filter the images later using the Attributes to only display our best images.
Labels
Images can also be assigned labels. By default the labels are named and represented by colour. Red, Yellow, Green and Blue can can be assign to an image using the number 6–9. Pressing the number again will remove the label.
Views
At the bottom of the Images Viewer pane are five selectable views.
Grid
Grid is the default view. it displays all images based on the selected folder, and filter that have been applied.
Loupe
You can enter loupe view by clicking the loupe button or by double clicking an image. This view displays a single image and allow you to zoom in to see more detail. You select FIT, FILL, 1:1 or 1:2 from the top of the navigator pane to to zoom to the corresponding level.
Compare
Compare will display two selected images side by side and allow synchronised navigation. This is very use full when comparing two similar images or a before and after.
Survey
Survey displays all selected images on one screen removing any superfluous interface item. It eliminates the need to scroll to see additional images allows us to quickly compare the images.
Faces
This feature will help identify faces in your catalog and help build collections based on them.

No comments to display
No comments to display